

Installing new blinds sounds straightforward until you’re standing in front of a window with a measuring tape and realize there are more decisions involved than you expected. Getting blinds installation Friendswood takes a bit of planning, and knowing what to expect before you start saves a lot of headaches along the way.
Why Blinds Are Still a Go-To for Friendswood Homes
Blinds have stayed popular for good reason. They offer daily adjustable light control, they’re available at a range of price points, and they work in almost every room type. In Friendswood specifically, the amount of direct sun coming through south and west-facing windows makes having actual slat control worth something. You can angle them to cut glare without blocking light entirely, which is something fabric shades can’t do with the same precision.
The two materials that come up most often for residential installation are real wood and faux wood. Real wood has a warmer, more natural grain and is a solid choice for bedrooms and living rooms. Faux wood is the better call for kitchens, bathrooms, and any room that deals with humidity, which in Friendswood is a real consideration for much of the year.
Aluminum Blinds for Utility Spaces
Aluminum mini blinds are worth mentioning for utility areas, garages, and workspaces. They’re lightweight, inexpensive, and hold up fine in spaces that don’t need the same finish as the rest of the house. For living areas and bedrooms, though, wood or faux wood is typically the better fit in terms of durability and appearance.
Measuring for Blinds: What You Need to Get Right
Measurement is the part that trips people up most often. The window opening needs to be measured at three points, top, middle, and bottom, because frames are rarely perfectly consistent. You use the narrowest measurement for inside-mount blinds so the blind fits into the opening without rubbing the sides.
For outside-mount blinds, you measure the area you want covered and add a few inches on each side for light block and visual weight. An outside mount is often the right choice when the window doesn’t have enough depth to accommodate an inside-mount blind, or when you want the window to look larger than it is.
Inside Mount vs. Outside Mount
The inside mount gives a cleaner, more built-in look. The blind sits inside the window frame and doesn’t extend beyond it. The window depth needs to be at least two to three inches to make this work without the blind rubbing against the glass or sill.
The outside mount covers more of the wall around the window, which is useful for blocking light gaps at the sides and making smaller windows feel more substantial. It also gives you more flexibility on sizing since you’re not constrained by the exact frame dimensions.
The Installation Process
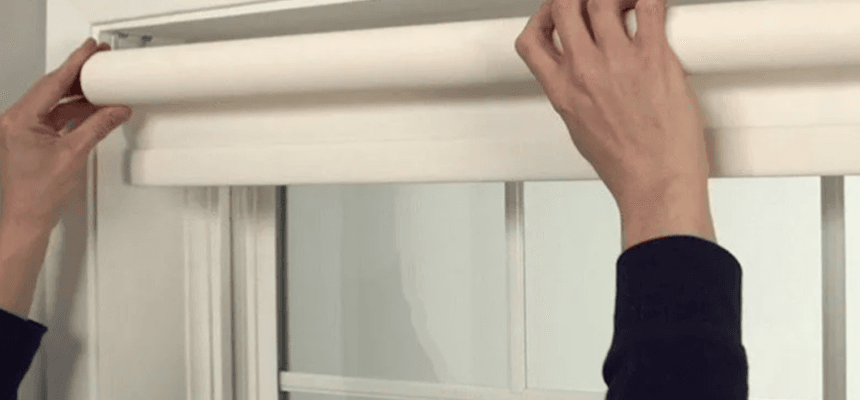
Once the blinds arrive, installation itself moves quickly when the measurements are right. The brackets go in first, set level with the opening. The headrail clips into the brackets, and the wand or lift cord attaches to the slat mechanism. Before moving on to the next window, test the blind fully, raise it, lower it, and tilt the slats through their full range to make sure everything moves without resistance.
If a blind tilts unevenly or the slats don’t lay flat when closed, it usually points to a bracket that’s slightly out of level or a headrail that isn’t fully seated. These are easy to correct during installation and much more frustrating to deal with after the fact.
Common Mistakes to Avoid
Ordering blinds based on rough measurements is the most common issue. Even being off by a quarter inch on an inside-mount blind can make it impossible to fit inside the frame. Always measure twice, and if you’re ordering for multiple windows, measure each one separately even if they look identical.
Another issue is skipping the level check on brackets. A headrail that isn’t mounted level will cause the blind to hang slightly crooked, and the slats won’t close evenly. It’s a small thing to check upfront that makes a big difference in how the finished installation looks.
Working with a Local Professional
Some homeowners take on blind installation as a DIY project, and for a single standard window, it’s manageable. Where it gets more involved is in homes with many windows, unusual dimensions, or windows that are out of square. In those cases, working with someone who does this regularly is the more reliable option.
Gulf Coast Blind & Shutter handles blind installation throughout Friendswood and the surrounding area. Owner Kim Van Wieren does the measuring and installation personally, which means the person selecting the product is the same person putting it in. That kind of direct involvement tends to produce better results because there’s no miscommunication between a sales team and an install crew.
After Installation: Keeping Blinds in Good Shape
Faux wood and aluminum blinds are the easiest to maintain, a damp cloth handles most dust and grease. Real wood blinds should be dusted regularly and kept away from prolonged moisture exposure. Avoid harsh cleaning products on any blind finish, since they can strip the coating and cause the surface to dull over time.
Blinds that operate with a cord should be checked periodically to make sure the mechanism is moving smoothly. A cord that starts to fray or a tilt wand that resists turning is usually an early sign that the mechanism needs attention. Catching it early is easier and less expensive than waiting until something breaks entirely.
Blinds installed correctly and maintained reasonably well should give you years of use. In Friendswood’s climate, choosing the right material for each room and getting the measurement right from the start are the two things that matter most.